Women's Travel Abroad

For Women About Women By Women
Activities
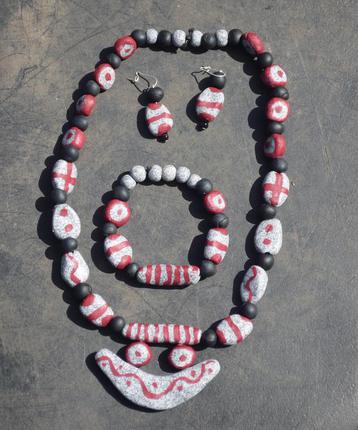
Make Your Own Prehistoric Jewelry
Necklace, Bracelet, and Earrings
You Are Welcome to Contact Me Personally With Comments or Questions
Copyright 2017 Creative Travel Publications, LLC
The Azilian people lived in a time of climate change. The cold steppe environment they were adapted to began to gradually warm up and was replaced by birch and pine forests. Moose, ibex, chamois, red deer, roe, and boar replaced auroch and reindeer as primary food sources. As a result tools also changed. Flint blades, microlithes, were smaller, narrower, and more pointed. Harpoons, made of horn, became an important new tool. Blades and harpoons were affixed to handles of bone or antlers and used for hunting smaller, faster prey. These hunters, fishers, and gatherers moved from place to place in search of food. They even stopped painting murals on cave walls.
CRAFT SUPPLIES
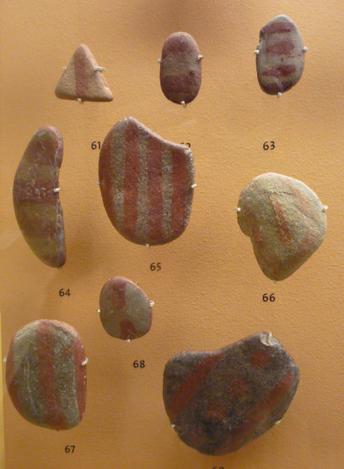
The patterns painted on the pireau beads resemble those on pebbles found on the sandy floor of a prehistoric cave, Mas d'Azil, in southern France. The Mesolithic rocks, made of blue-grey schist, look like they were smoothed and shaped by the continuous action of water in a river bed. The decorated rocks were usually small, flat, and oval but some displayed at the museum are elongated and triangular. Can you imagine a prehistoric artist sloshing through the cold river water to find the perfect rock for her pebble project? I can and my design for this project is only meant to be a suggestion. You can shape and decorate your beads any way your prehistoric self would like.
Archaeologists and researchers are not certain about the meaning of the pebbles, where the pebbles were painted, or how these pebbles came to be deposited in the cave. However, they can tell us who made the pebbles and the materials used to make them. The pebbles were painted during the early Mesolithic period, about 12,000 years ago, by people of the Azilian culture from southern France and northern Spain.

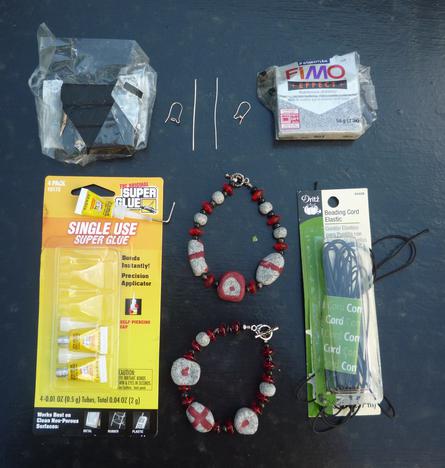


Staedtler Granite #803
Fimo Clay
1 package ( 2 ounces )
Black Fimo Clay
1 package ( 2 ounces )
Dritz Black Elastic 9340 B
Beading Cord ( 5 yards )
Super Glue
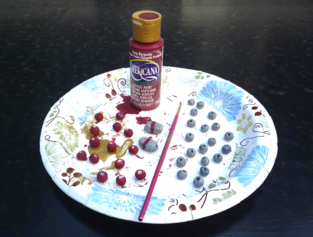
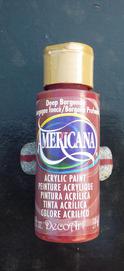
Americana Deco Art Deep Burgundy Acrylic Paint
1 bottle ( 2 ounces )
2 Silver Earring Wires or Posts
2 Silver Head Pins ( 2 to 3 inches long )
2 black seed beads (not pictured)
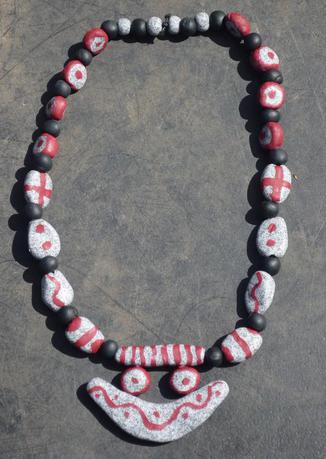
My inspiration for this pireau, a set of jewelry with similar design elements, came to me when I saw the collection of prehistoric painted rocks on display at the National Museum of Antiquities, Saint Germain en Laye, France. The necklace, bracelet, and earrings are constructed of hand-made clay beads and decorated with red acrylic paint. The necklace and bracelet are strung on elastic cord. The earrings are made with silver head pins and ear wires. I used granite Fimo clay for the painted and spacer beads and black clay for the other spacer beads. If you have the tools to make this project then the supplies should cost you about $20.
It also appears over time the mobile Azilian culture adapted its grand, large-scale practice of cave painting to smaller, more individualized works of art. Yet the materials used to create both of these art forms did not really change very much. The Azilian people who painted pebbles, like their ancestral cave painters, still continued to use the surface of rocks as their canvas and natural pigments to color their designs. However, there are still some obvious differences between cave and pebble painting. The first two, already mentioned, are related to location and size. Cave paintings are stationary and large while paintings on pebbles are portable and small. As such cave painting probably involved many artistic people whereas pebble painting could easily be done by a single, creative person.
Perhaps the most significant difference between the paintings on cave walls and those made on pebbles is their subject matter. To date no pebbles have been found with animal figures which, as a matter of fact, dominate the earlier cave paintings. The shapes of the painted pebbles found at Mas d'Azil resemble those found at many other Azilian cave sites. All of these rocks were decorated with red paint made of iron oxide. However, the motifs painted on the rocks appear to vary from cave to cave. Many of the pebbles found in the Mas d'Azil cave are dotted but most of the pebbles from Rochedare cave are painted with lines. Among the sixteen motifs found at other caves are cross, zigzag, and wavy squiggle patterns.
Some scientists think the stones may have been used during ritual activities, as game playing chips, or mathematical counting markers. However, recent research by Dr. Genevieve von Petzinger of the University of Victoria, British Columbria, Canada suggests these symbols might be an early form of symbolic communication. For her 2010 masters project Dr. von Petzinger surveyed and created a data base of ancient geometric signs she found in the Paleolithic caves of southern France. All of the 146 of the painted caves she surveyed had geometric signs, of one sort or another, painted on the walls. Her data base revealed 26 distinct patterns which include the dots, circles, lines, crosses, wavy squiggles, and zigzags designs similar to the ones painted on Azilian pebbles of the following Mesolithic period. Among the patterns she found are also the more complex signs like the slanted E pectiform and tree shaped penniform painted on Azilian pebbles.
LINES
WAVY SQUIGGLE
PENNIFORM
ZIGZAGS
CIRCLES and DOTS
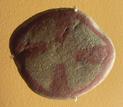
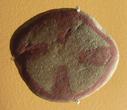
CROSSES
PECTIFORM
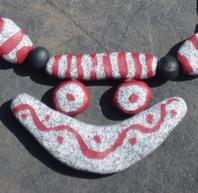
Looking at the design on my necklace you can see I used several of these patterns. The pendant has several shapes of beads and dots, lines, and wavy swirls that I have positioned to make into a smiling woman's face. Obviously, I like to incorporate whimsical elements into my creations. However, you may may not find this appealing and choose to design your own pendant differently. The final pireau design is entirely up to you and hopefully I have provided background information that inspires you to create your own masterpiece.
CONSTRUCTION IMPLEMENTS
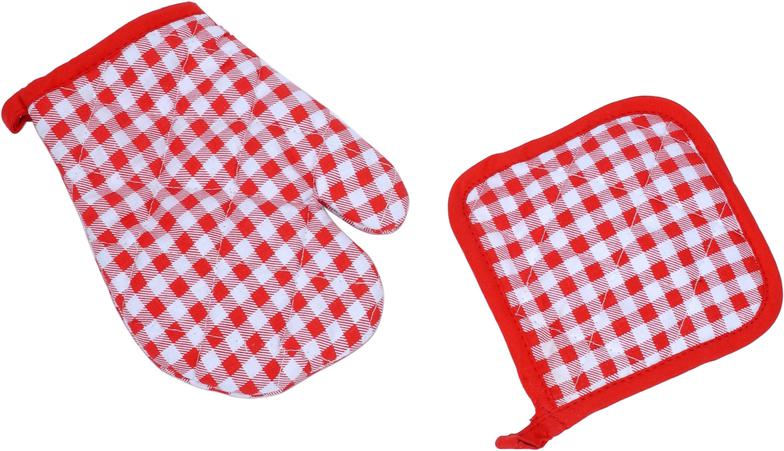
Protective Oven Mitts and Pads
Heat-Proof Cooling Surface
Tin Foil
Cookie Pan
Plastic Container
Timer
Baking Oven
Tongs
Assembling Your Pireau
Necklace
Round black beads - 20
Oval granite beads - 8
Circular granite beads - 10
Rectangular granite bead - 1
Banana granite bead - 1
Round granite beads - 4
The necklace, bracelet, and earrings I made are simply an example of a design that can be created by using the shapes and patterns painted on the Azilian stones. Obviously, nothing about this jewelry is perfect. I think that is what makes this such a fun project. It is easy to make and you can spend your time enjoying the activity. You may also want to use my directions to create a necklace, bracelet and earrings of your own design. To make this pireau set you will need to make:
Bracelet
Round black beads - 6
Oval granite beads - 2
Circular granite beads - 2
Rectangular granite bead - 1
Round granite beads - 6
Earrings
Round black beads - 4
Oval granite beads - 2
TOTAL
Round black beads - 30
Oval granite beads - 12
Circular granite beads - 12
Rectangular granite beads - 2
Banana granite bead - 1
Round granite beads - 10
Shaping the beads by hand mimics natural processes. Like the stones we find in our environment shaping by hand ensures no two are the same. That, in essence, is the beauty of this project. It does not have to be perfect. Nor does your necklace, bracelet, or earrings need to look exactly like mine. This is your creation.
When you cut and shape your beads you will get some extra ones (except for the rectangular and banana beads). You can use them to make your necklace longer and your bracelet larger or create other jewelry to give away. The additional round granite beads can also be entirely painted with red paint to add a pop of color to your set.
Round granite beads: cut 1 bar of dough, slice into 3/8 inch pieces, roll by hand into orbs.
Circular granite beads: cut 2 bars of dough, slice into 1/2 inch pieces, shape into 1/4 inch thick circles.
Round black beads use: cut off 2 bars of dough, slice into 3/8 inch pieces, roll by hand into orbs
Oval granite beads: cut off 3 bars of dough, slice into 3/4 inch pieces, shape into 1/ 4 inch thick ovals.
Rectangular granite beads: cut 1 bar of dough, slice in half, shape into 1/4 inch thick and 1 1/2 inch long rectangle.
Banana granite bead: cut 1 bar of dough, shape into 1/4 inch thick banana bead.
Pierce each bead through the center, from end to end, to make a hole large enough for the elastic string to pass through. To make the necklace more authentic you may choose to use leather cord instead of the elastic string. If you use leather cord you may need to adjust the size of the hole to fit the width of the cord.
Cover a medium size cookie pan with tin foil making sure the dull side is facing up. Bake all beads using the manufacturers directions for the dough you purchase. Lay beads on the cookie pan so none of the beads touch each other.
I baked all the round beads first, then the circular and oval beads next, and did the rectangular and banana shaped beads last. It takes more time to do three batches separately but this procedure allows you to bake beads of similar size and shape reducing the chance of over baking. If the granite dough is baked too long it will become a darker gray so set a timer. It is OK to open the oven and check on the color of your granite beads.
Please remember to use heat proof oven mitts or holders to remove the cookie pans from the oven. The beads will be hot so you will also need to put them on a heat-proof surface to cool. You can use tongs to remove each bead from the cookie pan. The beads can be strung as soon as they are cool or stored in a plastic container until you have time to complete the project.
When the beads are cool enough to handle you can begin painting them. I used a deep burgundy to simulate the rich ocher color painted on the Azilian rocks. If you cannot find that particular color any dark red will suffice. You could also decorate your beads with black paint. Some of the prehistoric Azilian stones were painted with black pigments.
I painted and arranged the beads of my pendant to resemble a the face of a happy person I envision as a woman. The two eye-like round beads are first glued to the rectangular bead and then the banana shaped bead with super glue. Make sure your beads are positioned correctly before you glue them together. Super glue dries very fast and cannot be undone.
Obviously, the design of the pendant is not authentically Mesolithic but I really like to add a bit of whimsy to my designs. The whimsical face amuses me. It is possible prehistoric Azilion women might also have found it amusing if they were still around to see. The patterns and shapes I chose to shape and paint my beads are just a few of the many prehistoric Azilion pebble designs. If you would like to use other ideas for shaping and painting the beads of your jewelry check out this website for inspiration:
www.drawingsongwriting.org/images/drawing/077/jpg
So now is the time to screw off the cap of your paint bottle, take up your brush, and start painting. I painted the back and front of each of my beads with the same design. However, you can certainly vary the design from front to back. Be sure to allow enough time for the beads to dry thoroughly before you string them.
This necklace is 20 inches in length and the bracelet is 8 inches in length. Both are strung on elastic jewelry cord so they stretch to almost twice their original size. They slip easily over my head and onto my wrist. The cut length of the necklace cord is 22 inches and the bracelet cut length is 10 inches. The necklace is knotted at 20 inches and the bracelet at 8 inches.
Cut the excess cord from the ends of the knot and secure the knot with super glue. If you choose to use a non-stretchable string for your necklace and/or bracelet you will need to allow extra length for ties or add a closure. You will also want to measure around your neck and wrist to ensure they fit exactly the way you want.
To make the earrings first string a seed bead onto the head pin, then add on an oval bead, and finally a round black bead. Shape the top of the wire into a circle with your needle-nose plier and clip off the excess wire with your wire cutter. Slip the beaded wire onto an earring wire. Detailed instructions can be found on:
www.monkeysee.com/12884-beading-basics-how-to-make-a-simple-pair-of-earrings
I hope you enjoy making and wearing your new jewelry. I would like to see photos of your finished creations so, with your permission, I can post them on my blog. Please send photos to my email with the message: my pireau project, OK to publish photo and text. For the security of my computer and your computer I will not open an attachment about this project without this information and exact wording.
HAPPY CRAFTING
PLEASE NOTE
I have made every effort to ensure all of the information on this page is accurate. However, due to differing conditions, tools, and individual skills I cannot be responsible for any injuries, losses, and/or any other damages which may result from the use of the information on this page.
This activity is not suitable for children to construct or wear.
PLEASE BE ADVISED
It is imperative you use the proper safety gear and handle tools carefully while doing this project.
Plastic Needle
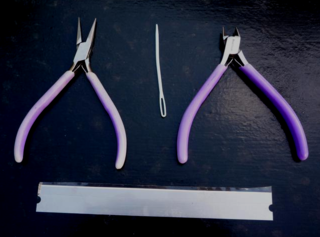
Wire Cutter
Needlenose Plier
Roundnose Plier
(not pictured)
Scissors
(not pictiured)
Paintbrush
Paper Plates
Ruler
Cutting Device