Make Your Own Venus Necklace
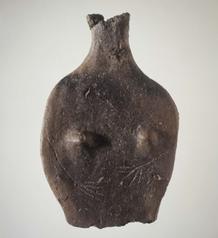
I find this Venus charming. She may have also had a head and legs. If you look closely at the figurine you will see arms and hands etched on her torso. This detailing is somewhat unusual. Venus figurines usually have very few details. However, the chiseled face features of the Venus of Brassempouy is one of the artistic elements that makes her so unique. Could someone have also taken the time to etch eyes, nose, and mouth on this Venus's missing head.
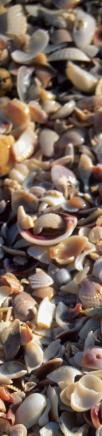
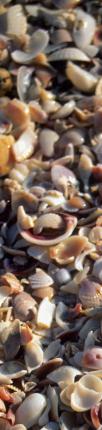
Personal adornment was an important part of prehistoric life as you can see in the necklace from the National Museum of Antiquities, Saint Germain-en-Laye, France. This necklace was constructed during the Paleolithic era. It's made entirely of shells found in the coastal areas of southern France. In all likelihood the string on which the shells are threaded would have been sinew. Making jewelry out of things au natural was just as prevalent then as it is now. Shells were sought after and traded for other valuable commodities. They are still part of our modern day trade goods and are sold in stores worldwide.
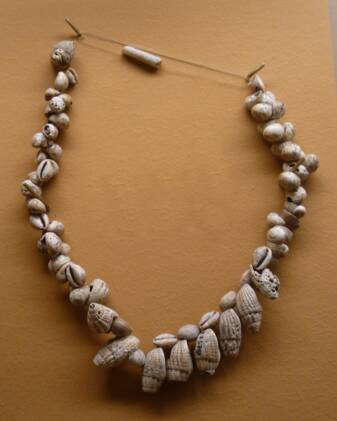
Paleolithic Shell Necklace
National Museum of Antiquities
Saint Germain-en-Laye, France
Women's Travel Abroad
For Women About Women By Women


Paleolithic Stone Venus
National Museum of Antiquities
Saint Germain-en-Laye, France
You Are Welcome to Contact Me Personally With Comments or Questions
Activities
Copyright 2017 Creative Travel Publications, LLC
PLEASE NOTE
I have made every effort to ensure all of the information on this page is accurate. However, due to differing conditions, tools, and individual skills I cannot be responsible for any injuries, losses, and/or any other damages which may result from the use of the information on this page.
This activity is not suitable for children to construct or wear.
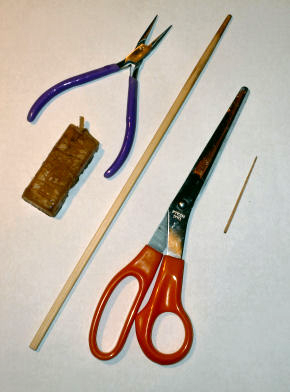
Needlenose plier

PLEASE BE ADVISED
It is imperative you use the proper safety gear and handle tools carefully while doing this project.
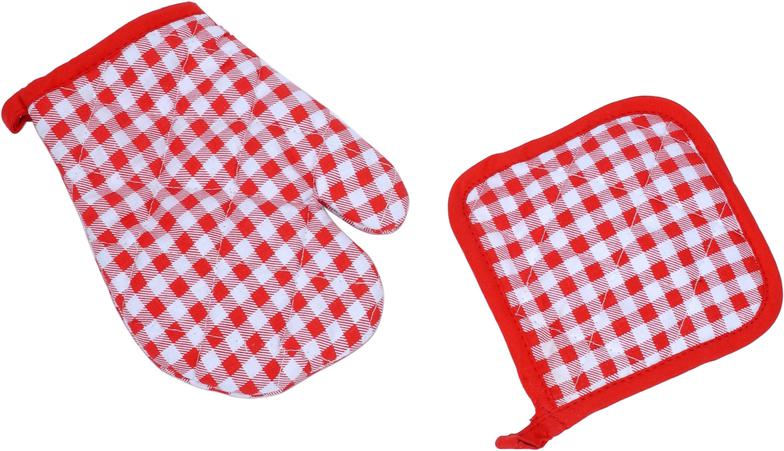
Protective Oven Mitts and Pads
Heat-Proof Cooling Surface
Tin Foil
Cookie Pan
Baking Oven
Timer
Tongs
Plastic Container
INRAP
Venus figurines were found at a variety of Late Paleolithic sites all over France. They were made of a variety of natural materials. Some were carved from animal bone or antler. Others, like the one pictured above, was shaped from clay. The National Museum of Antiquities has an extensive collection of both kinds of figurines. The most recent clay Venus was found in a pile of ashes at the Neolithic settlement of Bercy just down the Seine River from Paris.
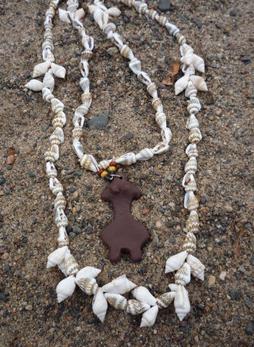
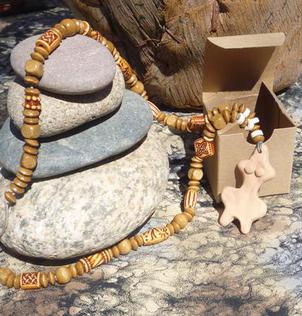
The inspiration for this jewelry came from the prehistoric shell necklace and clay figurine I saw on display at the National Museum of Antiquities, Saint Germain en Laye, France. It is made from a string of shells I bought at a thrift shop and oven-bake clay beads, leather string, and wire findings I purchased at a local craft store. If you have the tools to make this project it should cost about $10. It is an inexpensive and simple project to make.
CRAFT SUPPLIES
CONSTRUCTION IMPLEMENTS
ASSEMBLING YOUR NECKLACE
Bees wax
2 inch long wire pin
6 colored glass seed beads
Venus figurine template - CLICK HERE for pdf download
40 inches stringing cord
Scissors
Toothpick
Chop stick
1 small package brown
oven-bake clay


1 circular metal ring
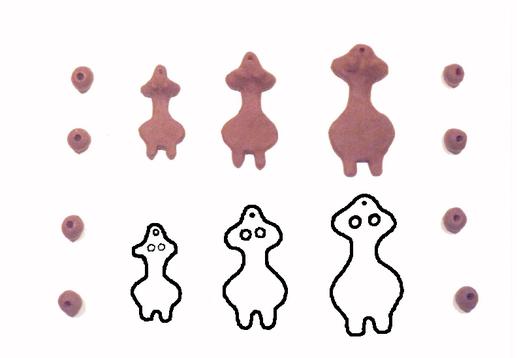
Although I have used brown color oven-bake dough for my Venus pendant you may choose any color you like. The pendant for the Neolithic luncheon party favor I used a clay colored oven-bake dough. Follow the directions on the oven-bake package to prepare the dough for shaping. Choose the size pendant you would like from the template pattern. I have provided you with a pattern for a small, medium, and large pendant.
Lay the pliable dough on the outlined form shaping it to fit within the form. You could also roll your dough out to a size large enough for the size pendant you choose, cut out the paper pendant, lay the pattern on the dough, and use a knife to cut around the Venus shape. The dough for either technique should be at least 3/8 inch thick to give it stability.
shell beads with holes for stringing
To form the breasts simply pinch up some of the dough to create a raised lump. Use the toothpick to delineate the shape of two separate mounds. Then use your figures to shape the mounds into two round lumps of the exact same size. Use the toothpick to poke a hole about 1/4 inch down from the neck portion of the figurine for attaching the metal circular loop.
Shape the 1/2 inch round beads, in the color of your choice, by rolling the softened dough between the palms of both hands. The beads should be similar in size and shape but a little variation can make them look more prehistoric. Use the chopstick to poke a hole in the center of each bead for stringing.
The number of beads you make depends on the length of the necklace you choose and the number of shells you have to string with them. Always make a extra beads for your sample bake and in case you decide to extend the length of your necklace. You will have enough in a small package oven-bake clay to make the pendant and beads for an entire necklace.
For the best results bake your pendant and beads using the manufacturer's directions written on the package. I cover a cookie sheet with aluminum foil, shine side down, placing my beads about 1/2 inch apart. I usually try to make a sample tray of several beads just to be sure I have baked them the correct amount of time. When I have determined the cooking time I set my timer and put the pendant and remaining beads in the oven to bake.
When the timer goes off put your oven mitts on or get your hot pads and carefully remove the cookie sheet from the oven. Use the tongs to remove the pendant and beads to a heat-proof cooling surface. When they are cooled you can store them a plastic container and construct the necklace at a later time or begin work on it right away. Remember to turn off your oven.
To make your necklace look authentic I suggest you use string made of natural fibers or leather although elastic cord or ribbon will work just fine. The necklace length is entirely up to you. I made this one around 30 inches. Measure the string to your desired length and add 4 extra inches for ties. Situate the pendant in the center of your string. Add beads and shells in any pattern you like so they are equal in length on both sides. Tie a knot or two on each end of the string to secure the beads in place.
Use the needle nose plier to open the circular ring. Slip the ring through the hole in your pendant. Close the ring with the needle nose plier. Use the plier to shape the 2 inch wire into a V and slip it onto the circular ring attached to the pendant. Put 2 or 3 of the seed beads on each arm of the V and turn over the top of each end of the V with the plier to form a closed loop. You can skip this process. Make a loop in the center of the string, slip the loop through the hole in the pendant , and tie it off.
This necklace is very adaptable. I altered the design and changed the materials to use it as a party favor activity for the Neolithic luncheon. To make the project easier to construct I made all the Venus figurines before the luncheon, choose plastic beads that looked similar to those carved on prehistoric antler bone plus a collection of different shapes of wooden beads, and used a simple knot to tie on the pendant.
I decided to assemble all the supplies in a festive box and tie the necklace string around the box as a decorative element. This eliminated the time my guests would spend making the figurine and the need for specialized tools. However, by including a variety of beads each guest could create a personalized Venus necklace of their very own.
I hope you enjoy making and wearing your new necklace. I would like to see photos of your finished creation so, with your permission, I can post it on my blog. Please send photos to my email with the message: my Venus necklace project, OK to publish photo and text. For the security of my computer and your computer I will not open an attachment from you without this information and exact wording.
HAPPY CRAFTING
2 1/2 inches
2 inches
3 inches
HEIGHT